 FLASHLOOK.AI
How to Bulk Generate AI Product Photography with Flashlook MCP
Automate your entire photoshoot pipeline with Flashlook MCP: connect Cursor or Claude at flashlook.ai/mcp, then bulk-generate on-model product photography and short video for catalog production.
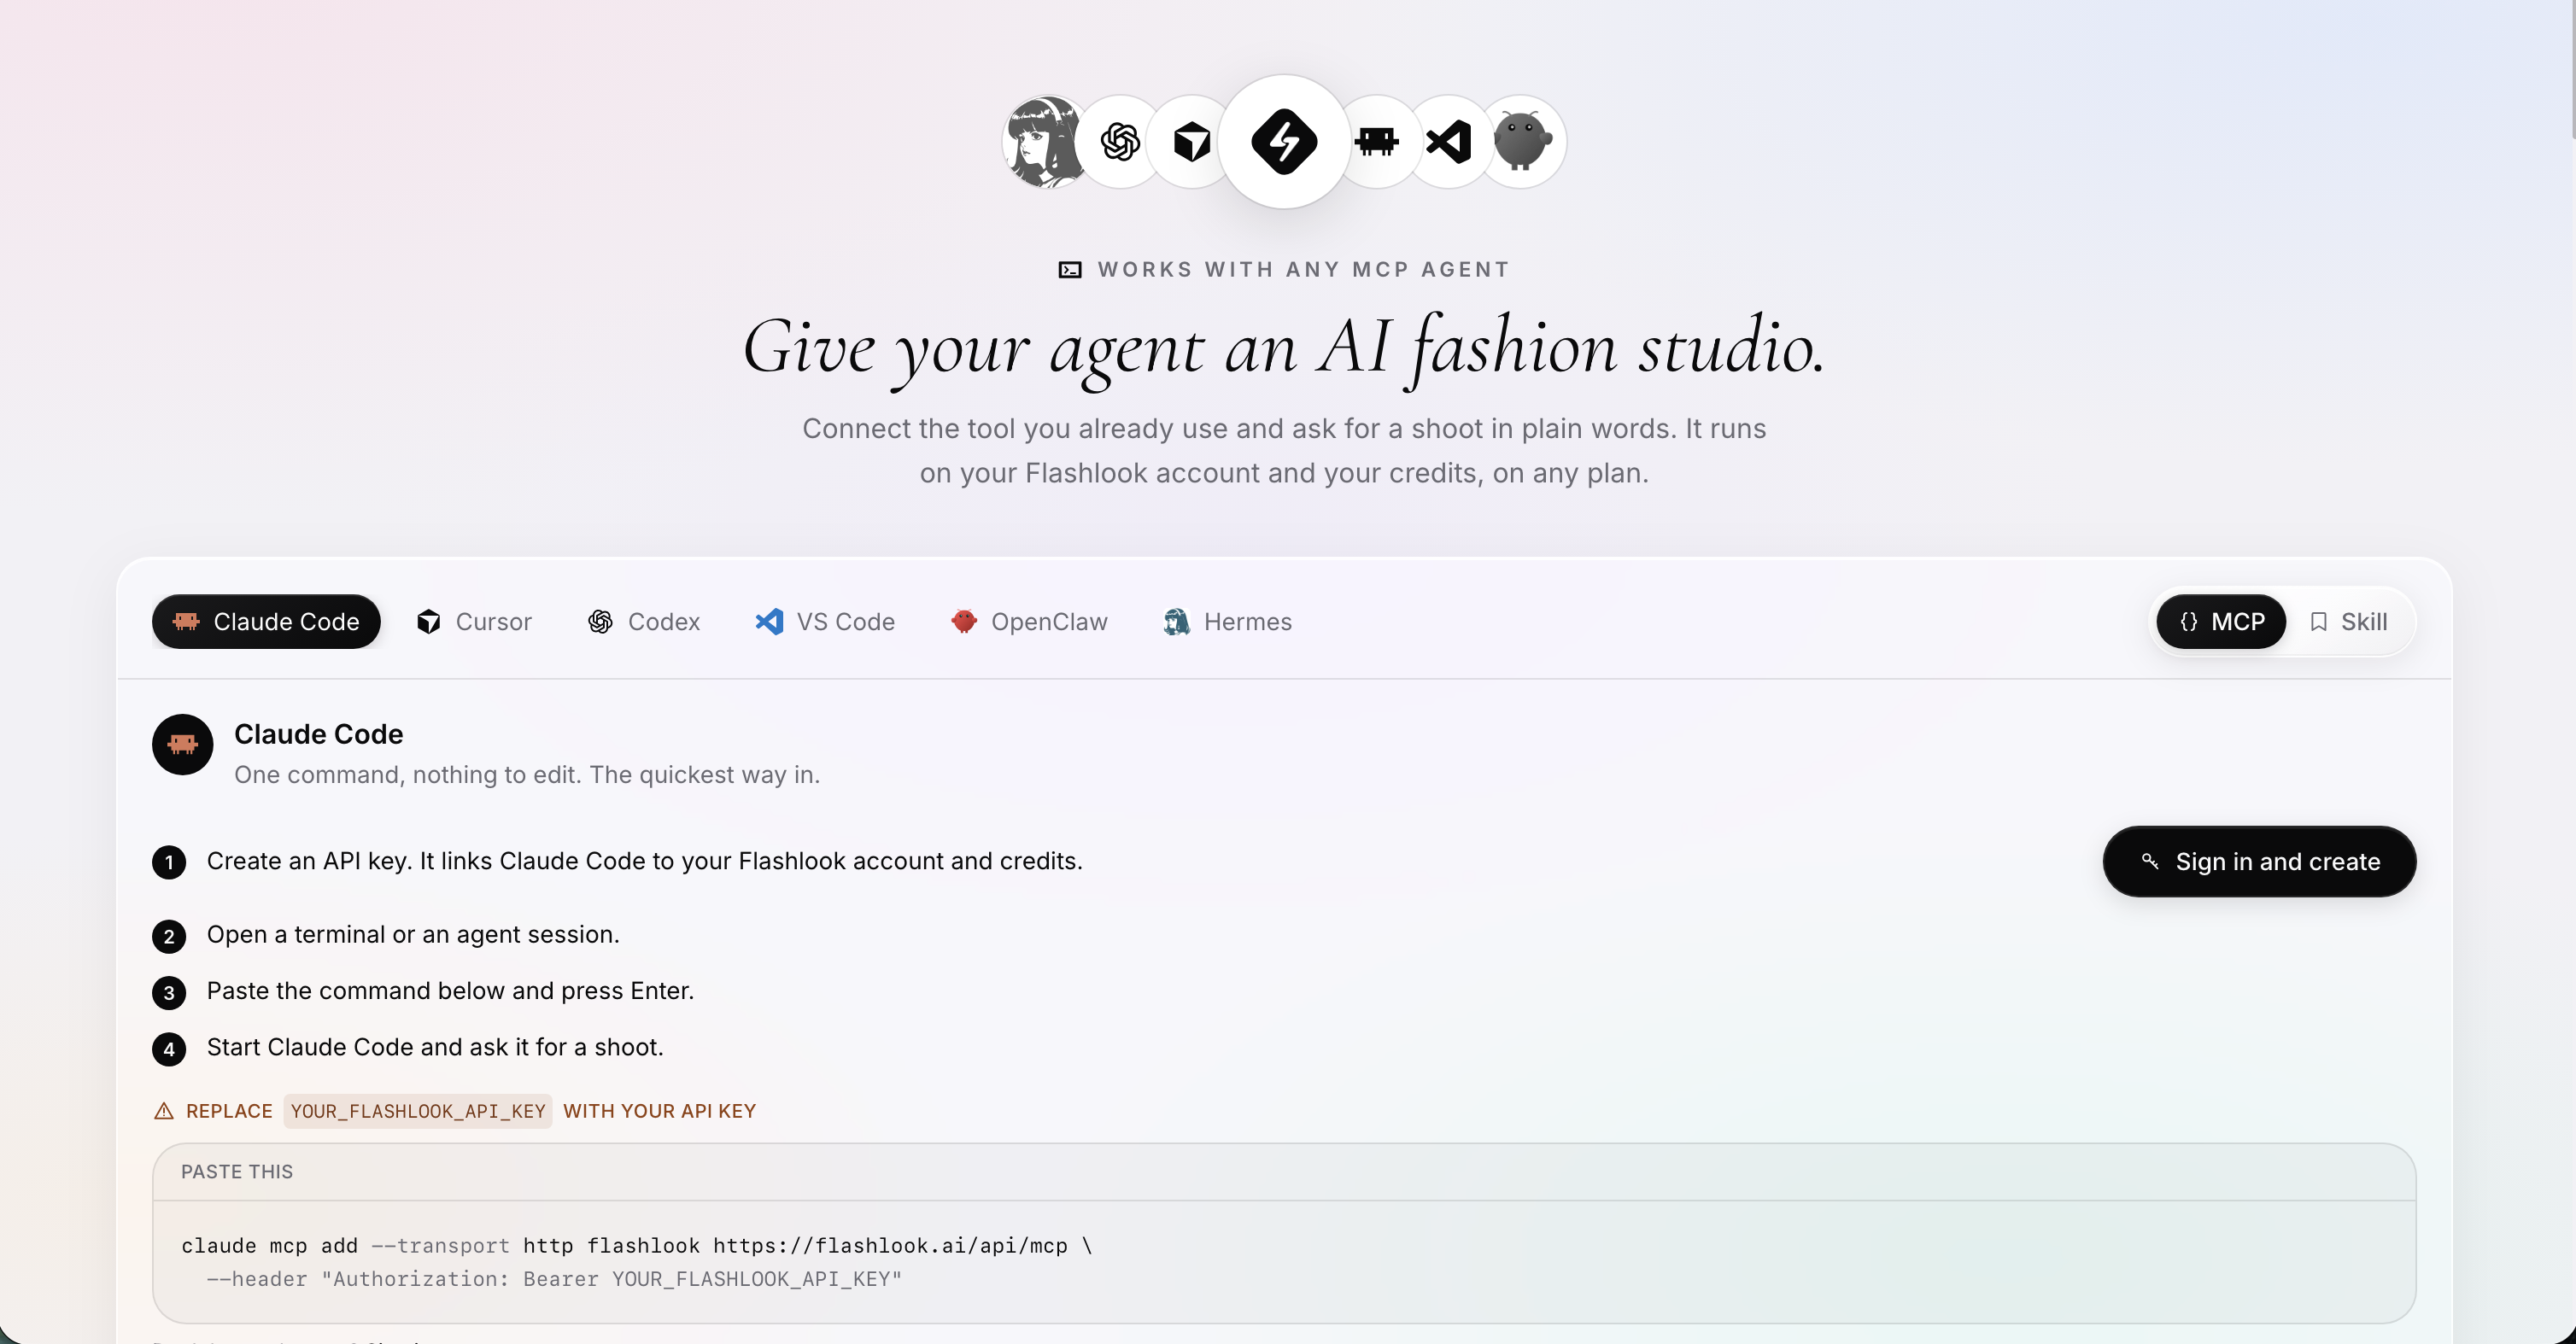
If you are searching for how to automate your entire photoshoot pipeline, this is the practical path: connect an AI agent to Flashlook MCP, then run on-model product photography and short product video in bulk without booking a studio day.
Flashlook is an AI modeling agency: you cast a locked model once, then shoot products on that same identity as stills or short clips. The fastest way to automate product photography from Cursor, Claude Code, Codex, or another MCP agent is not hand-wiring REST calls. It is the Flashlook MCP server, set up from one page.
Do everything from flashlook.ai/mcp. That page holds your API key helper, copy-paste connect steps for each agent, example prompts, and the full tool list. This guide shows how to scale catalog photography and automate fashion photoshoots end to end: connect once, then batch on-model stills and clips through your agent.
What you will automate
- A Flashlook account with credits.
- An API key created on the MCP page.
- Your agent connected to
https://flashlook.ai/api/mcp. - A repeatable AI photoshoot automation loop: add products → cast or pick a model → price the batch → shoot stills → optional video → collect URLs.
That loop is how teams automate ecommerce product photography and keep one face across an entire drop. You should not need OpenAPI, custom tool JSON, or a separate docs deep-dive to finish a first catalog batch. Keep flashlook.ai/mcp open while you work.
Step 1: Open the MCP page and create a key
- Go to https://flashlook.ai/mcp.
- Sign in if you are not already.
- Use Create a key on that page (same flow as account API keys: one click, works on every plan, including free signup credits).
- Copy the key once and store it somewhere safe. The agent will send it as
Authorization: Bearer ….
Credits: every start_shoot and generate_video spends from the same balance as Studio. Check balance from the agent later with a plain ask ("How many credits do I have left?") or in your Flashlook account.
Step 2: Connect your coding agent (simple version)
Think of Flashlook MCP like adding a new app to your AI assistant. Until it is installed in the assistant's settings, the assistant cannot take photos for you. Pasting the setup into the chat is not enough by itself.
The rule in plain words
- Settings or config file = where the connection lives (this is what you copy from flashlook.ai/mcp).
- Chat = where you ask for shoots after it is connected ("shoot this dress on Aria, studio, 4:5").
- After you save the settings, reload / restart your assistant so it picks up Flashlook.
- You will know it worked when Flashlook shows as connected, or when the assistant can answer "What Flashlook models can I use?" using Flashlook tools.
You do not need to be a developer. Follow the tab for your tool on the MCP page. That page already has the exact text to copy.
Can I paste the setup into the chat and ask the agent to install it?
Often yes, as a helper:
- Paste the block from flashlook.ai/mcp into chat and say: "Please add this Flashlook MCP server to my config."
- The agent may write the settings file for you.
- You still need to reload the app (or refresh MCP servers) so the connection turns on.
- Then start a normal chat and ask for a shoot. Do not expect the JSON alone in the message to unlock Flashlook tools.
If the agent cannot edit settings files, use the click-by-click steps below instead. Same result.
Where to paste (by assistant)
Open flashlook.ai/mcp → Connect your agent → pick your app. Use that snippet. Below is what each one means in simple words.
 Claude Code
- Open a terminal.
- Copy the one command from the Claude Code tab on the MCP page.
- Paste it into the terminal and press Enter (your key is part of that command).
- In Claude Code, run
/mcpand confirm Flashlook is listed.
No JSON file required for the basic setup. It is one install command.
 Cursor
- Open Cursor Settings → Tools and MCP.
- Choose Add custom MCP server (Cursor opens a settings file, often called
mcp.json). - Paste the JSON from the MCP page.
- Replace
YOUR_FLASHLOOK_API_KEYwith your real key from Step 1. - Save, reload Cursor, and check that Flashlook shows a green / connected status.
Example of what you paste into that settings file (not into the chat as the final setup):
{
  "mcpServers": {
    "flashlook": {
      "url": "https://flashlook.ai/api/mcp",
      "headers": {
        "Authorization": "Bearer YOUR_FLASHLOOK_API_KEY"
      }
    }
  }
}
 Codex
Codex
- Open the Codex settings file shown on the MCP page (often
~/.codex/config.toml). - Paste the Codex block from the MCP page at the end of the file.
- Put your real API key in place of the placeholder.
- Save and restart Codex.
- Ask it to list tools and look for Flashlook.
 VS Code and other MCP apps
- Open the MCP / servers settings for that app (the MCP page names the file when it matters). VS Code, OpenClaw, Hermes, and similar tools all follow the same pattern.
- Paste the matching snippet from flashlook.ai/mcp.
- Add your API key.
- Save and reload the app.
- Confirm Flashlook appears as a connected server or as available tools.
Same idea everywhere: install Flashlook into the assistant once, then talk normally to run photos and video.
Optional: Agent Skill
On the same MCP page you can install the Flashlook Agent Skill. That is a short playbook so the assistant remembers to check options and price a shoot before spending credits. Useful, not required for the first connection.
Step 3: Check that it worked
In a normal chat with your assistant, ask something free:
- "What Flashlook image models and aspect ratios can I use?"
- "How many credits do I have left?"
If the assistant can answer using Flashlook (not guessing), you are connected. If it says it has no Flashlook tools, go back to Step 2 on flashlook.ai/mcp, fix the settings, reload, and try again before you spend credits on shoots.
Step 4: Add products for the batch
For catalog production, get products into Flashlook first. From the agent (plain language is enough):
- Point at local image files or URLs: "Add these three photos as products named …"
- Or: "List my products" if they already exist in Studio.
Under the hood the agent uses create_product / list_products / get_product. Aim for clear product photos (flat lay, hanger, or simple phone shot). Clothing, bags, jewelry, fragrance, and similar categories all work.
Step 5: Cast or pick a locked model
Consistency across a rack needs one identity reused on every SKU.
Ask the agent:
- "Cast a female model in her late twenties for this dress and save her as Nadia." (
smart_pick_model, then save/render as needed) - Or: "List my models" / "Shoot on Aria" if you already have a roster.
Preview and lock identity in Studio when you want a permanent book face; MCP can reuse saved models for every later batch.
Step 6: Price the batch before you spend
Before a large run, ask:
- "What would 5 studio 4:5 images on Lumen Refined cost?"
- "Quote shooting all of these products, 2 frames each, on Nadia."
The agent should use price_quote (and list_options for tier names). Adjust count, model tier, or aspect ratio until the credit total fits the job.
Step 7: Run bulk stills and automate the shoot loop
Prompt for volume in one instruction. Examples you can paste (also listed on the MCP page):
- "Add the three photos in ./dresses as products, then shoot each one on Aria in a 4:5 studio frame."
- "Shoot my new blazer on a model outdoors at golden hour, 5 variations, coherent set."
- "Reuse my Studio Soft preset for this new product instead of setting the look again."
This is the core of programmatic product photography and batch product photography for a full rack:
- Name the model to reuse.
- Name the products (or folder) to shoot.
- Set framing (often 4:5 for PDP), scene (studio / outdoor), and how many frames per SKU.
- Tell the agent to wait until each task finishes and return image URLs.
The agent will call start_shoot, then wait_for_task / get_task. A shoot usually takes about one to two minutes. Collect the returned URLs into your PIM, CDN, or design handoff.
Step 8: Turn heroes into short product video (optional)
When a still is approved, ask:
- "Take the last image from my gallery and animate it into a 5-second clip."
- Or point at a specific shoot URL: "Generate a 5s Reel clip from this frame."
That uses generate_video with the same locked identity. Quote first if you are doing many clips. Good for PDP hover, ads, Reels, and Stories.
Step 9: Checklist to automate your photoshoot pipeline at catalog scale
Use this every time you scale on-model photography or rerun an automated pipeline:
- Open flashlook.ai/mcp if the agent ever loses the connector.
- One locked model per campaign or season.
- Products uploaded and named consistently.
price_quotebefore multi-SKU runs.- Fixed aspect ratio and scene family so the set looks coherent.
- Wait for task completion; do not assume instant URLs.
- Save gallery links or download in one pass.
- Optional: animate only hero SKUs to control video spend.
Common prompts that map to MCP tools
| You say | MCP tools (typical) |
|---|---|
| What can I use? | list_options, list_enums |
| Credits left? | get_account |
| Add these photos as products | create_product |
| Cast / list models | smart_pick_model, list_models |
| What will this cost? | price_quote |
| Shoot the rack | start_shoot, wait_for_task |
| Make a clip | generate_video |
| Show past work | list_gallery, list_templates |
You do not need to memorize tool names. The MCP page and Agent Skill teach the agent the surface; you brief in plain language.
Next step: turn one shoot into a pipeline
Open https://flashlook.ai/mcp, create a key, connect your agent, and run one product end-to-end (quote → shoot → URL). Once that works, reuse the same brief across the rack so you automate your entire photoshoot pipeline instead of directing each SKU by hand.
FAQ
Can I paste the Flashlook MCP JSON into the chat to connect?
Not by itself. The connection lives in your assistant's settings or config file. You can paste the block into chat and ask the agent to write that file for you, then reload the app. Or follow the Connect your agent steps on https://flashlook.ai/mcp for Cursor, Claude Code, Codex, VS Code, and others.
I am not technical. Where should I start?
Open https://flashlook.ai/mcp, create a key, open the tab for the app you already use (Cursor, Claude, and so on), and copy the text it shows into the place that page describes. Then reload the app and ask for a shoot in plain language.
Can Flashlook MCP automate my entire photoshoot pipeline?
Yes. From https://flashlook.ai/mcp you connect an agent, then automate product intake, model casting, credit quotes, on-model stills, and optional product video in one loop.
Is this the same as automating ecommerce product photography?
Yes for on-model catalog and campaign stills (and short clips). You keep one locked AI fashion model across SKUs so batch product photography stays visually consistent.
Do I need the REST API docs to bulk shoot with Flashlook MCP?
No. For agent-driven production and AI photoshoot automation, use https://flashlook.ai/mcp for keys, connect steps, prompts, and tools. Use REST only for custom backend integrations.
Does Flashlook MCP use the same credits as Studio?
Yes. Shoots and video spend from the same account credit balance as the Flashlook Studio UI.
How do I reconnect if Flashlook tools disappear?
Go back to https://flashlook.ai/mcp, open Connect your agent, paste the snippet for your app again, save, and reload the assistant.
Consistent AI fashion models for catalog and UGC. Open Studio · Browse AI Fashion models